Overview
SimpleClinic provides an easy way to securely manage your patient information.
Adding & Managing Patients
Clicking Patients from the right hand side navigation will load the patient management module.
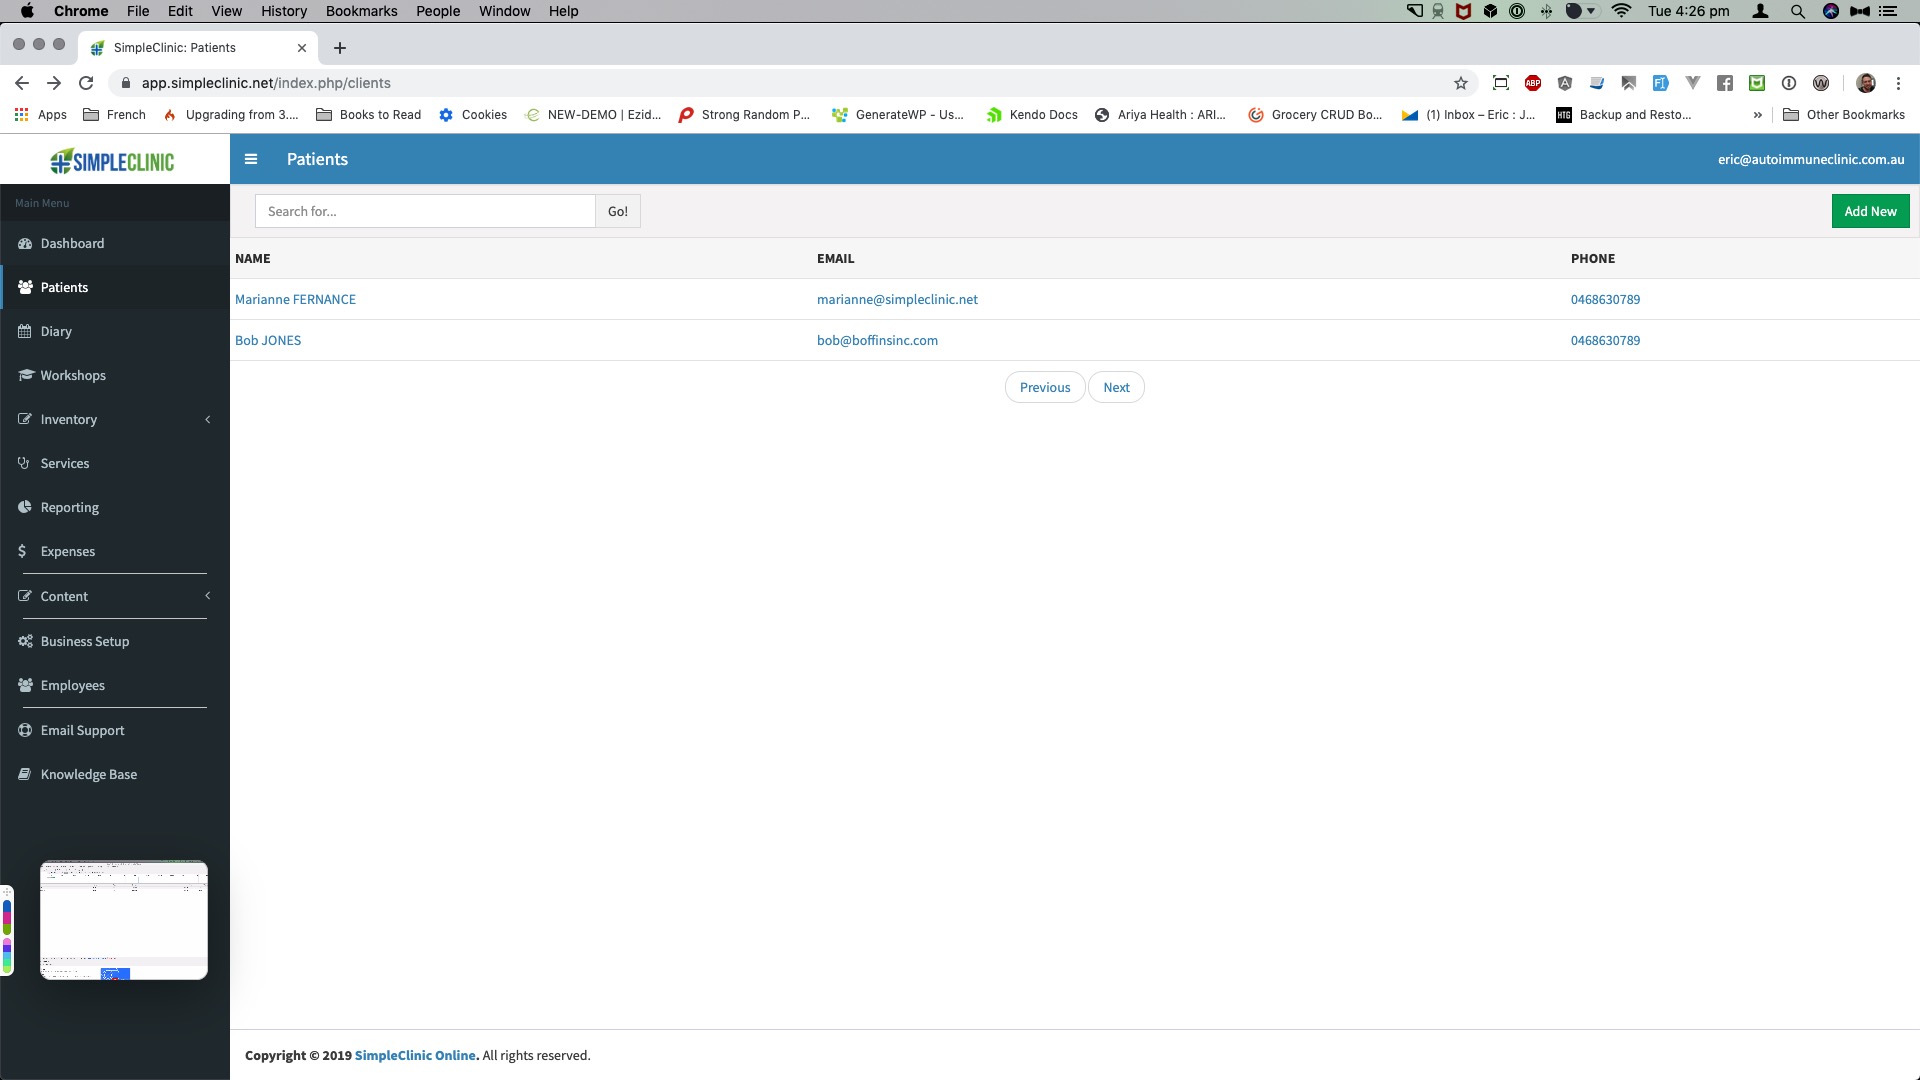
The action bar at the top of the page provides an easy way to search for your patients. Search on first name, last name, email, or phone number by entering the details in the action bar and click go.
The main content area will provide a list of matching patients. When a patient is selected the main content area will provide detailed information about the selected patient.
If you want to capture additional information about the patient that isn't covered in the default fields you can use custom fields to display additional fields.
Add a New Patient
To add a new patient, click the Add New button from the top right of the action bar.
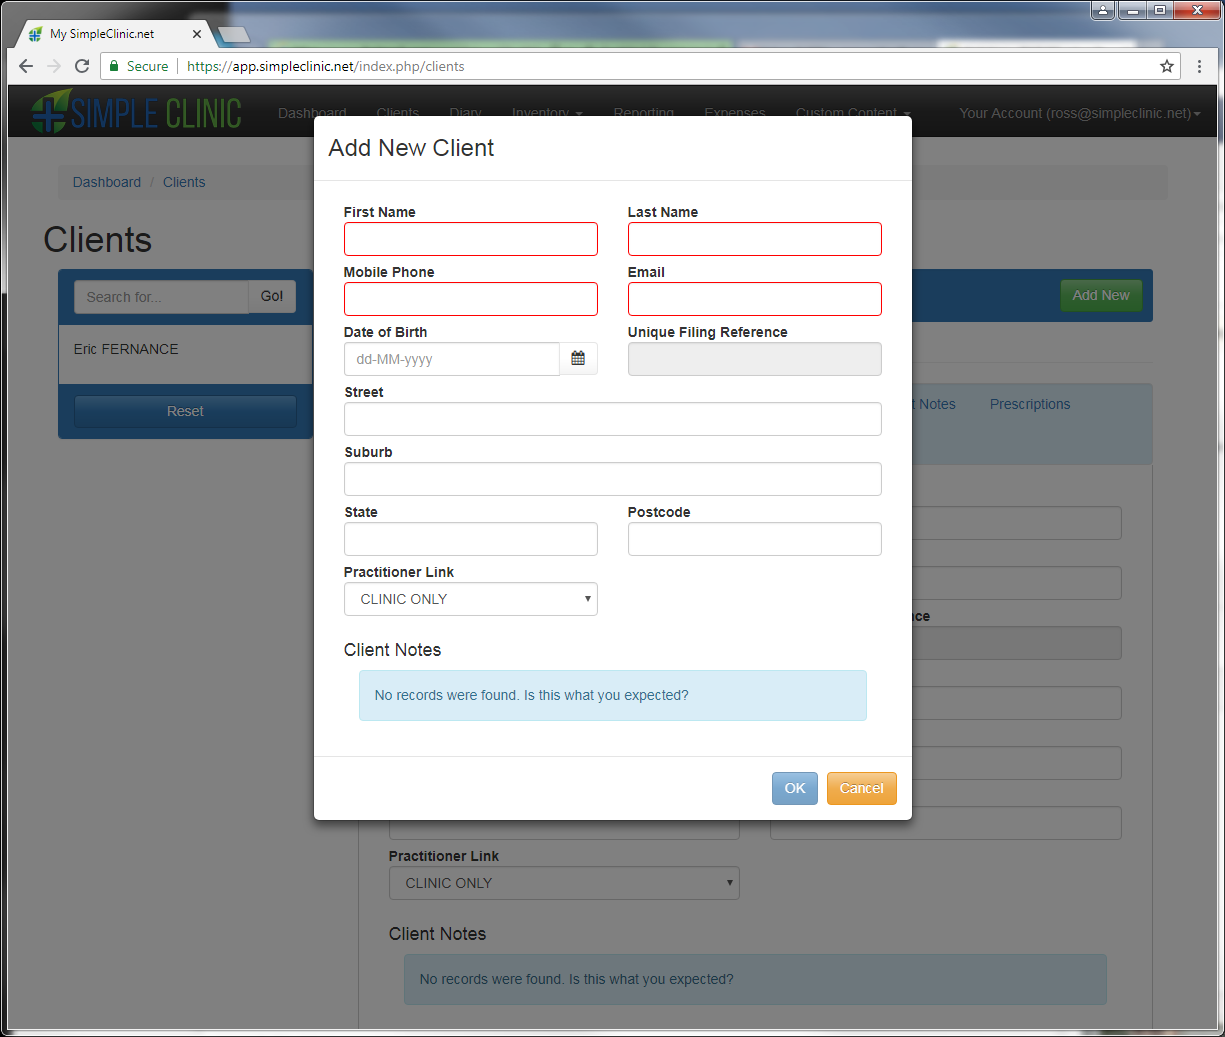
The red boxes indicate that those fields must be completed when entering a new patient. Other information is optional.
Once the new patient details have been entered just click OK to save. The new patient will be saved, and you will be returned to the main patients page with the patient selected in the main well.
If you have enabled any email marketing integrations (ie. MailChimp or ActiveCampaign) configured with SimpleClinic, the new patient name and email address will be added to the email list when the patient is created. However, this can be turned off for individual practitioners if required, in the Business Setup -> Marketing Integrations settings.
Edit / Manage a Patient
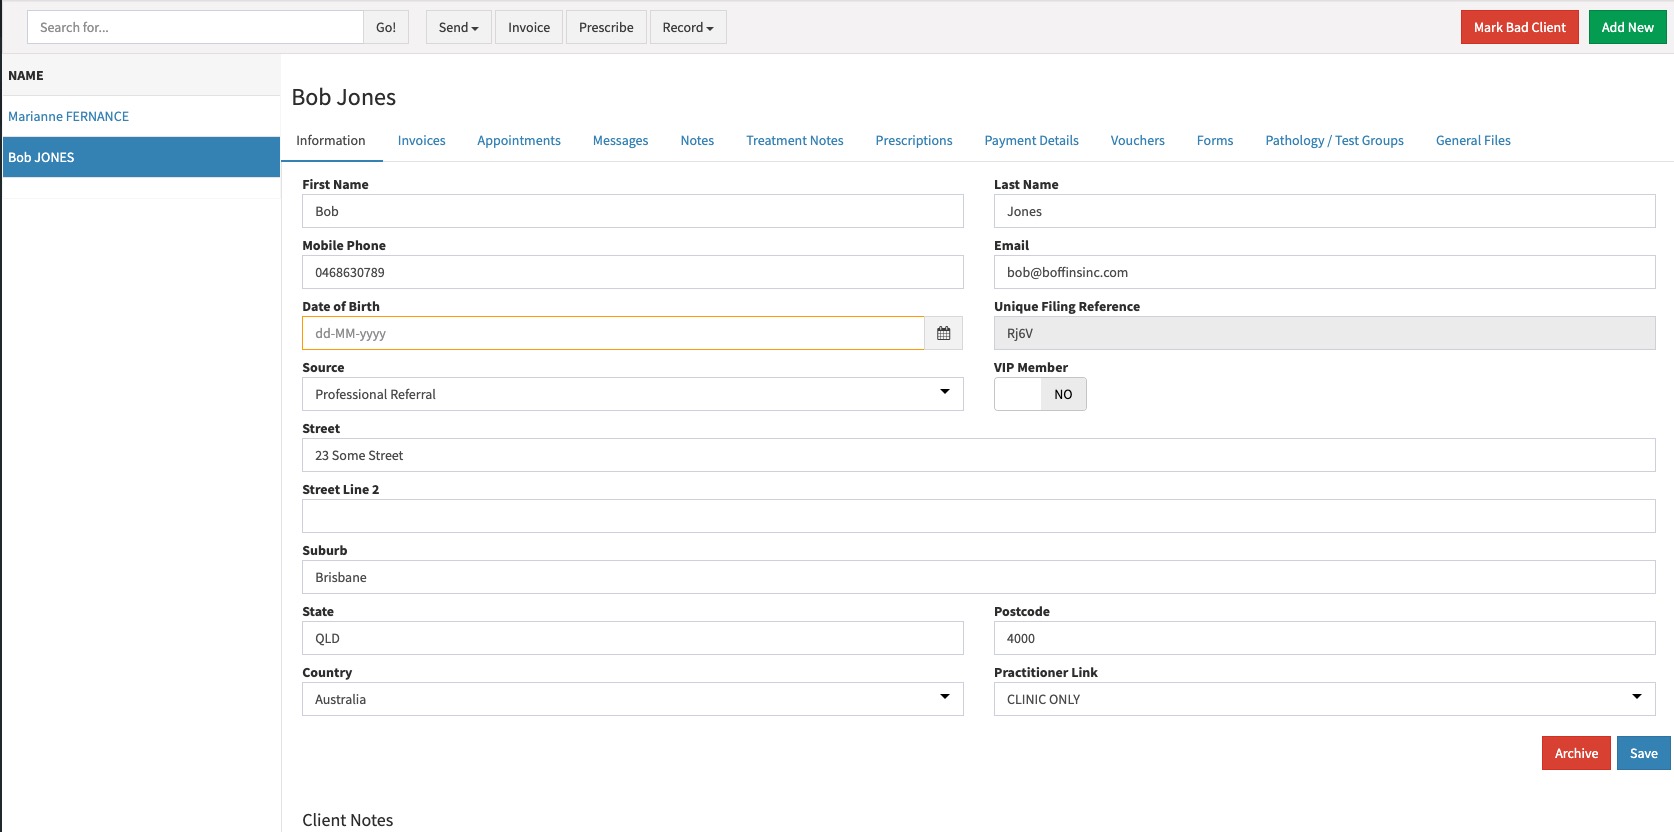
Once a patient is selected, the action bar at the top of the page will now provide additional options. In this case:
-
Send -- this option displays a drop down menu allowing you to send the patient either an email or an SMS text message. A modal window is displayed allowing you to enter the details of the email or SMS. If you have defined templates you can also use templates here.
-
Invoice -- This option allows you to create an invoice for a patient. This will be covered in more detail in the section on invoicing.
-
Prescribe -- This option allows you to create a prescription for a patient. This will be covered in more detail in the section on prescribing.
-
Record -- The record button allows you to record either a comment, treatment note or gift voucher for a patient. Comments are ad-hoc information notes that are displayed on the patient record or the invoice. Treatment notes are more detailed notes taken during a consultation and includes file uploads. This will be covered in the section on Treatment Notes.
Please Note: Do not store the patient's credit card details in any text fields in the patient record! Doing so would be a credit card security breach. Please instead register to use EziDebit and save any credit card details in the EziDebit tab for the patient, which hides the credit card details and stores them securely on the EziDebit servers. Contact Support for more information about EziDebit, and refer to the EziDebit sections in this manual for using this feature.
Each of the panels in the main well will provide additional details or related information about the patient.
-
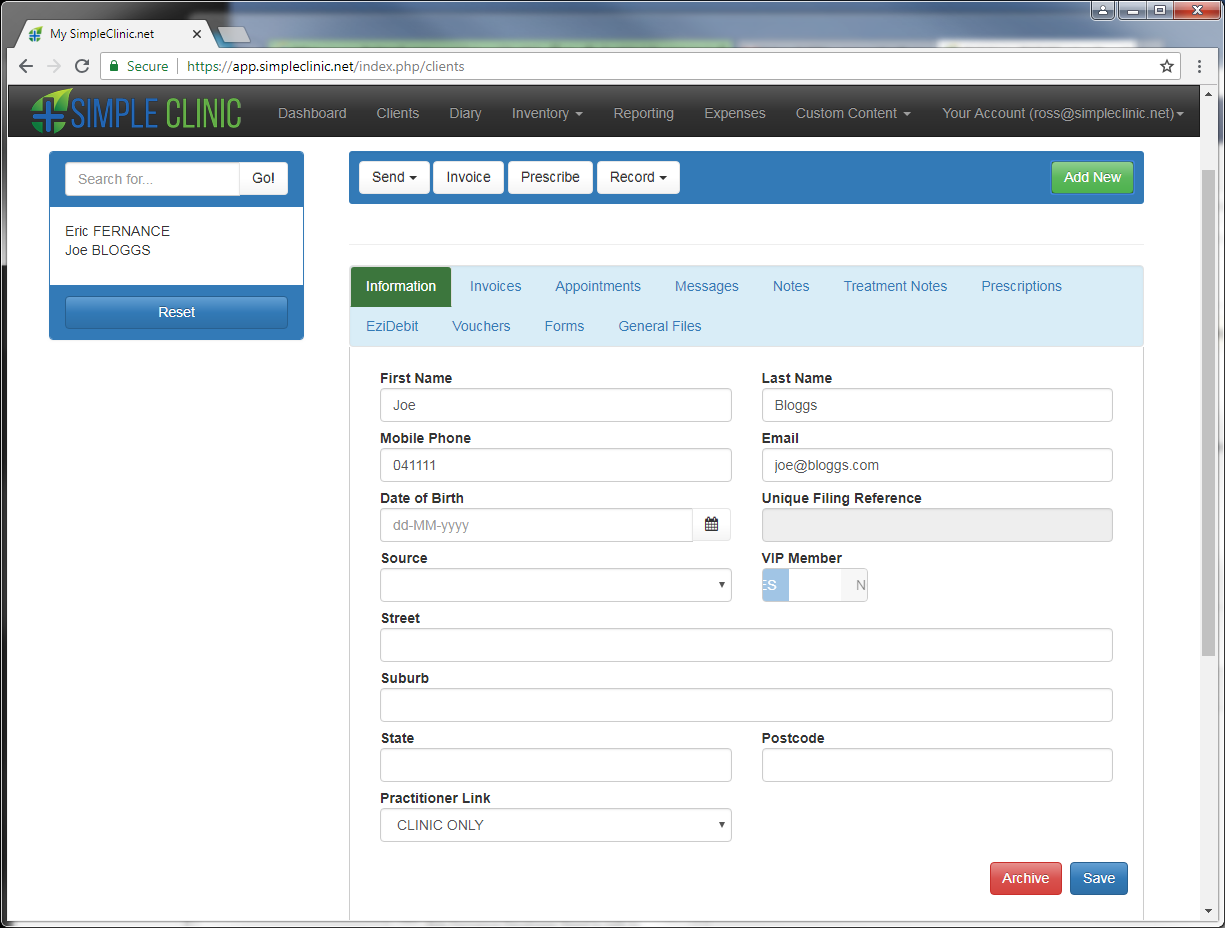
Information -- This panel provides the patient information and allows update and maintenance of information. After making changes click the Save button at the bottom of the page to apply. Changes to email details will be synced with email service providers if these have been configured.
-
Invoices -- The invoices panel will provide a list of the patient invoices in a tabular format with quick links to view, email, SMS or delete each invoice.
-
Appointments -- The appointments panel will provide a list of all the patient appointments, past and upcoming, with the option to view, or delete each appointment.
-
Messages -- The messages panel will provide a list of all messages that have been sent to the patient through SimpleClinic. This only includes messages created through SimpleClinic but not the email or SMS messages you have created externally.
-
Notes -- The notes panel will provide a list of all the notes that have been made by clicking Record -> Comment from the action bar.
-
Treatment Notes -- The treatment notes panel will provide a list of all treatment notes that have been created for the patient with the option to view, or delete each treatment note.
-
Prescriptions -- The prescription panel will provide a list of all prescriptions that have been created for the patient with the option to view, email, SMS or delete each prescription.
-
Payment Details -- The Payment Details panel will provide a list of stored payment details for this Patient. Before adding Payment Details you will need to integration with one of our payment providers (EziDebit, Stripe, or Square).
-
Vouchers -- The vouchers panel will display a list of vouchers that have been created for the patient along with the remaining balance and expiry dates. You will be able to delete vouchers.
-
Forms -- The forms panel will display any forms and data completed by the patient when electronic forms are sent to them, from using the Form Builder feature in SimpleClinic. The patient can complete forms online, and the data they enter will be saved into SimpleClinic for future reference.
-
General Files -- The General Files panel allows you to add or view documents which have been uploaded into SimpleClinic for the patient, but those files are not associated with a particular consultation. Use this for patient intake documents, previous pathology test results or other similar files.
Delete a Patient
You can delete / archive a patient by clicking the Archive button on the patient record. This action is immediate and will archive the patient. You will no longer be able to view past invoices, appointment history or treatment notes in SimpleClinic.
For legal reasons, patient details should be kept for 7 years after you last saw them, or longer for a child. Check your legal requirements for record keeping with your association.
To restore an archived patient go to the Report Centre -> Marketing Reports and choose the Archived Patients report. To the right of each archived patient name is a button to restore that particular patient. Click the Restore button to restore.
Merging Patients
In the event of duplicate records you can merge a patient into another patient record by clicking the Merge button at the bottom of the patient information page.
This will provide a modal window with an autocomplete for you to merge the patient recoord.
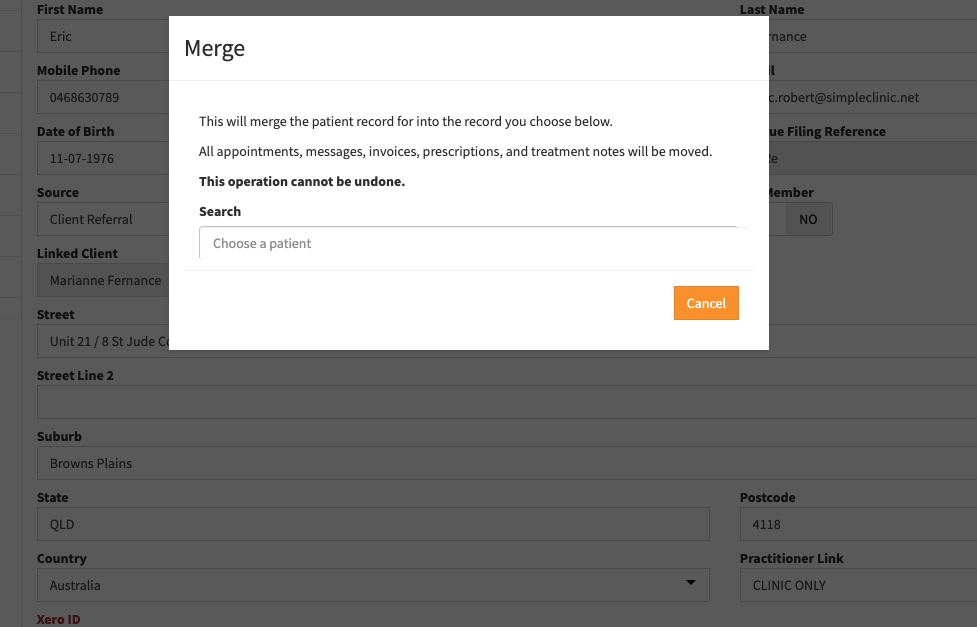
Merging a patient will NOT change the patient information of the target. It will copy the following records from the source to the target:
- Invoices
- Appointments
- Messages
- Notes
- Treatment Notes
- Prescriptions
- Payment Details
- Vouchers
- Form Responses
- Test Results
- Client Files
- Pathology Referrals
- Subscriptions
- Vitae Mosaic Data
After the merge has taken place the source patient record will be archived.