For Deprecated Diary View Users
These instructions relate to the new diary view introduced on the 11th November 2019. For instructions related to the legacy view diary please see here
Diary Management
Selecting the Diary menu item from the SimpleClinic menu allows you to create / edit / move / delete appointments in the diary.
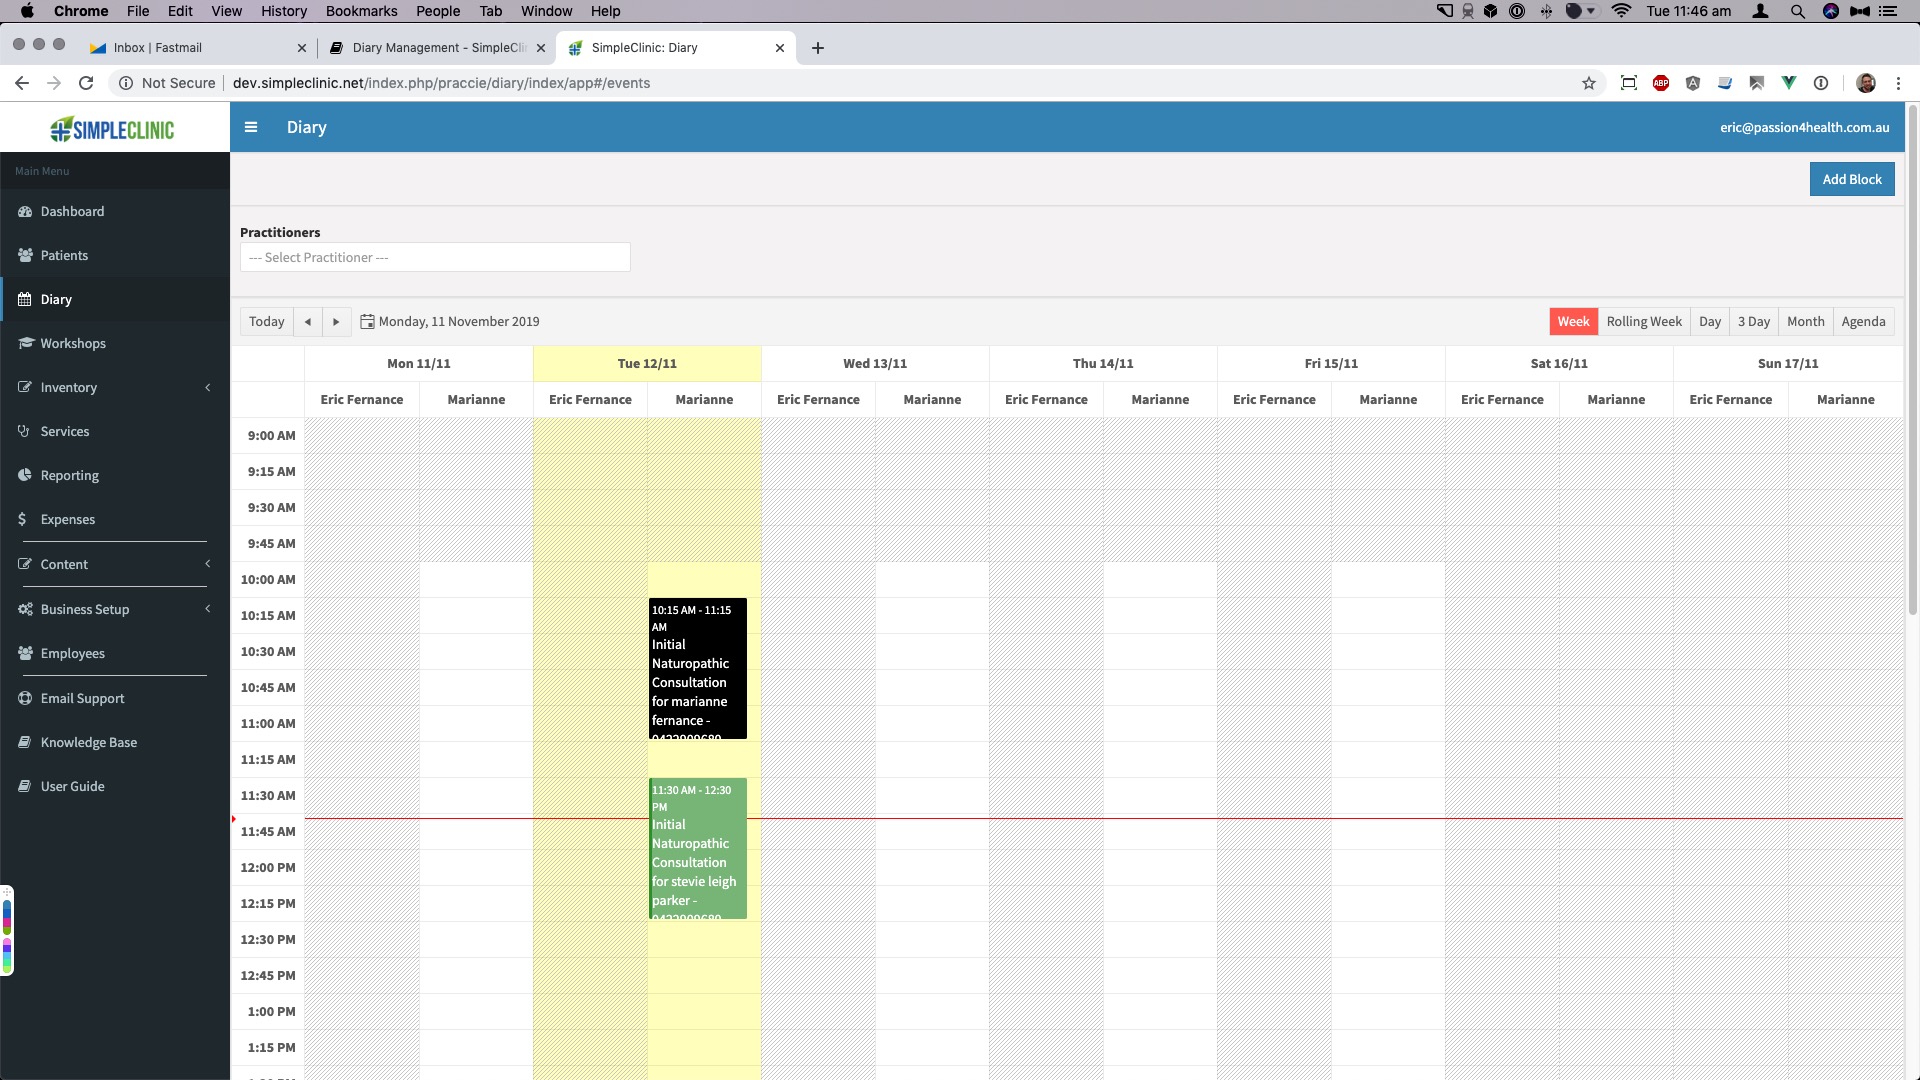
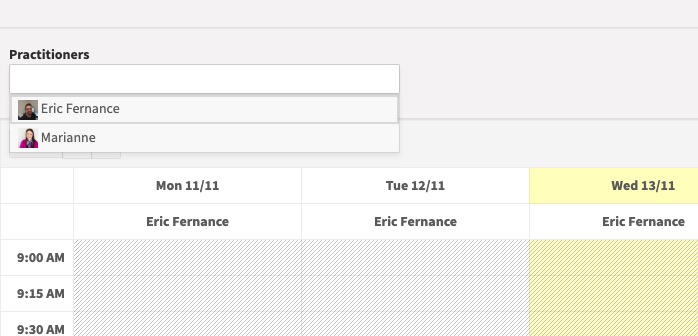
By default, ALL practitioners linked to your account will be displayed with each practitioner in their own column. You can filter the practitioners you wish to see by adding their names to the Practitioners drop down on the top left filter bar.
Tip
Once you have selected all the practitioners you wish to show click anywhere OUTSIDE the practitioner select box to close.
Access Roles & Visibility
Users with access level of Admin, Reception, or Employee will see appointments for ALL users in the diary. Users with access level of Practitioner will see only the appointments that are allocated to them.
The hours and time increment used to display the calendar are configured based on your Business Settings. The business administrator can change this from Business Setup -> Your Clinic -> Diary Settings.
The diagonal, gray, shading indicates times that are not available based on the users hours as defined in their Employee Schedule. See Employee Management for more details.
Create An Appointment
To create an appointment just click the time slot in the diary for which you would like to create an appointment.
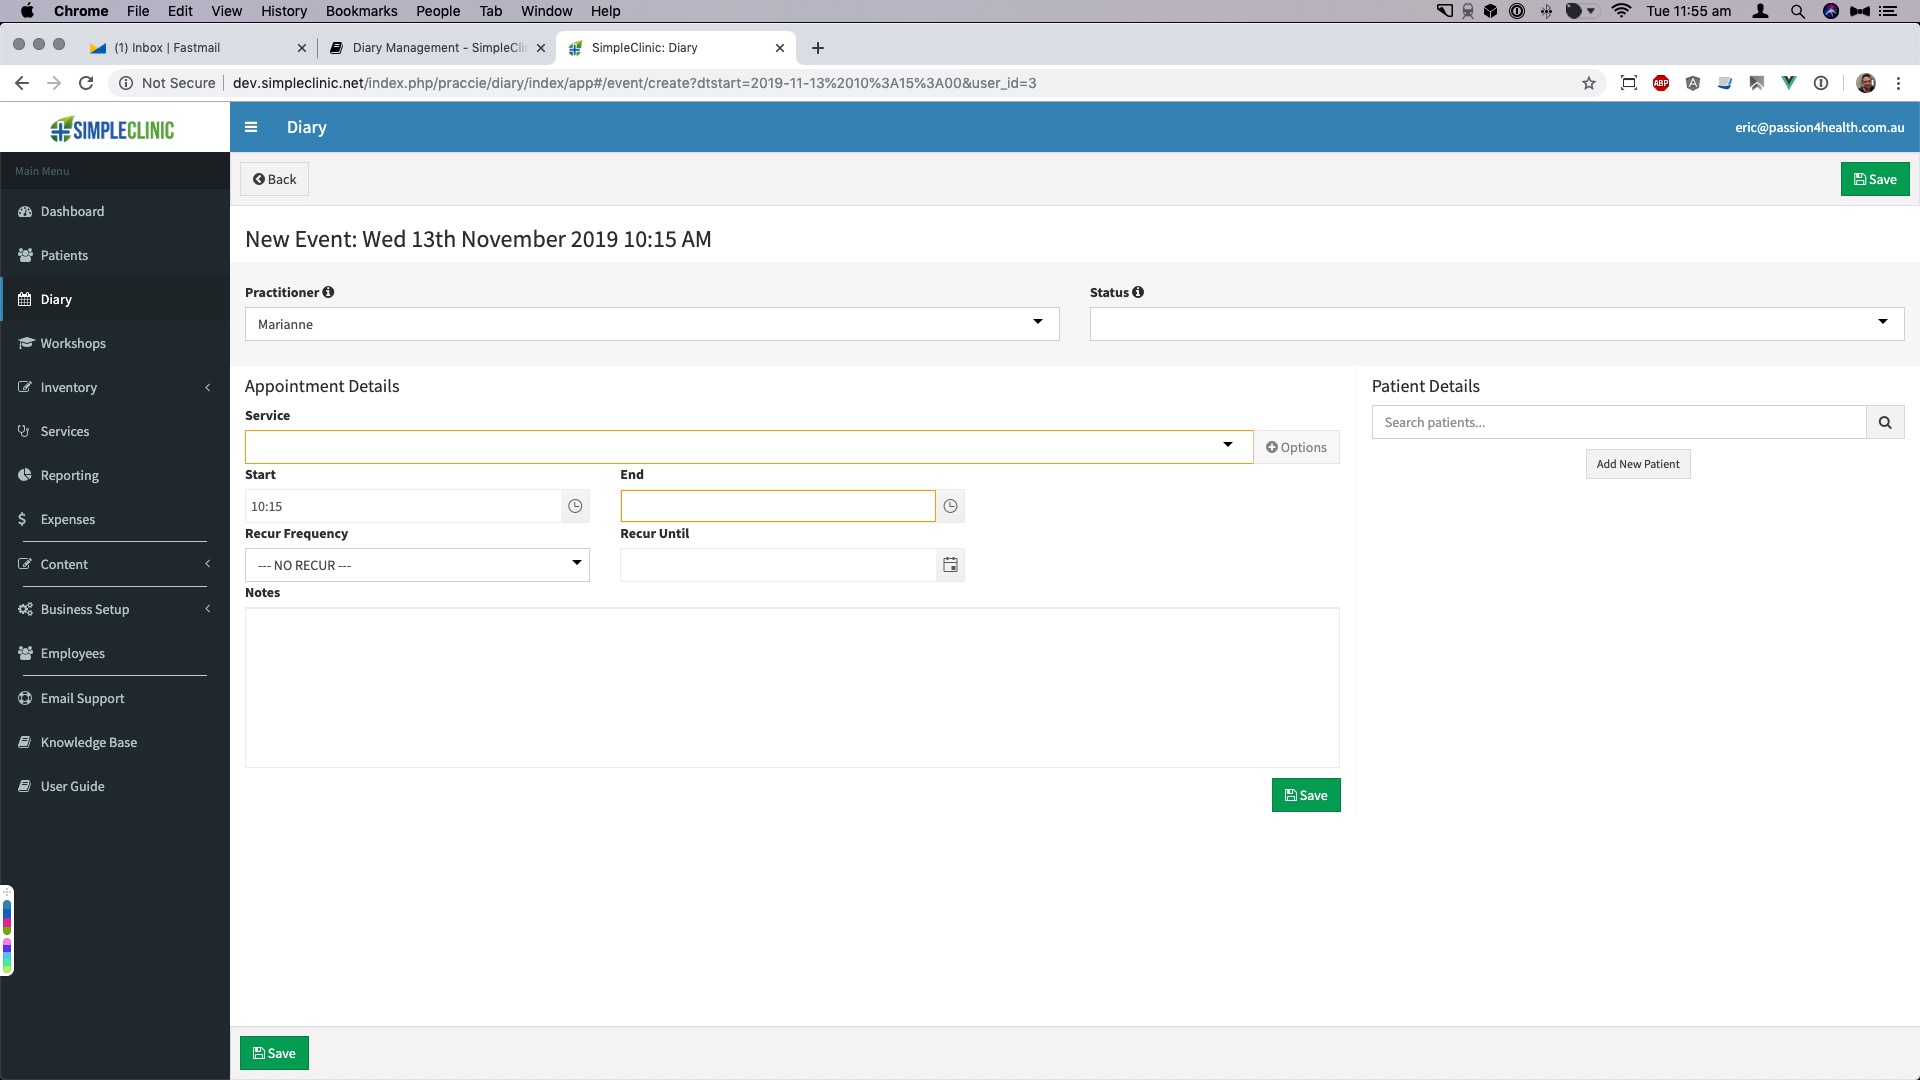
This will show a new page with details to create the appointment in the diary. The orange boxes indicate fields which are mandatory to complete in order to save the appointment. You can also search, create and edit patients directly from the diary.
The following sections will cover off the required information for creating an appointment.
Once all required information from the General Information, Appointment Details, and Patient Details sections have been completed click Save to save the appointment.
General Information
The Practitioner and, if enabled, Location are mandatory fields. The Practitioner will auto select from the column clicked in the main diary screen. The Practitioner can be changed if needed.
The Status is optional and defines the status of the appointment. If you have configured Status Colours in your Business Setup this will be one of the variables used to determine the colour coding of the appointment.
Appointment Details
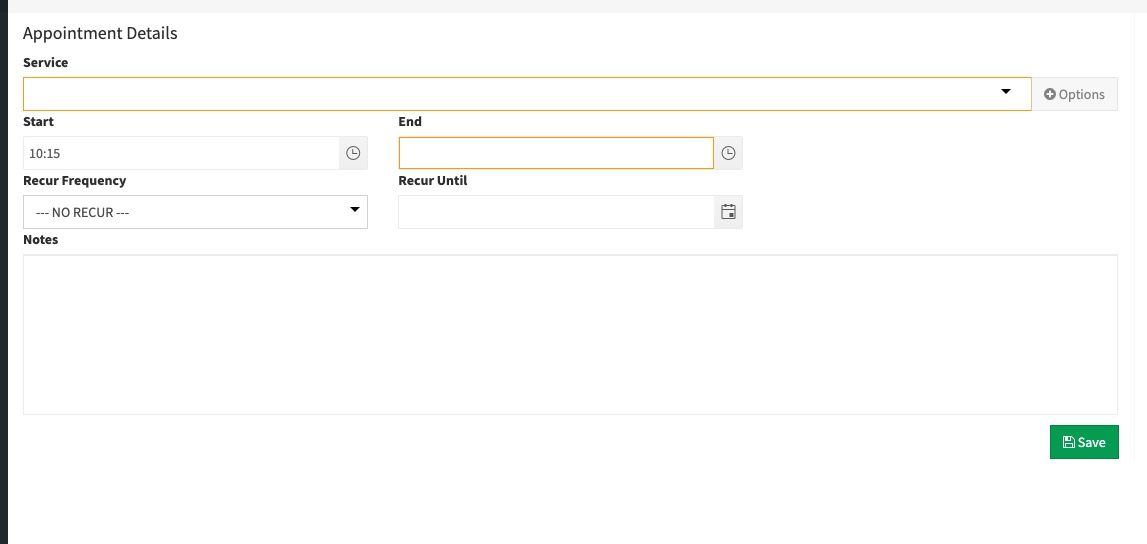
Appointment Details contain information about the appointment.
The following fields are required in the Appointment Details section.
- Service - this is the service the patient has booked for. The service list is filtered using the practitioner selected. If the service has options defined these can be added by clicking the Options button to the right.
- Start - this is the start time of the appointment in the timezone defined in your Business Setup.
- End - this is the end time of the appointment in the timezone defined in your Business Setup.
The following fields are optional in the Appointment Details section.
- Recur Frequency - If set this will indicate how frequently the appointment will recur.
- Recur Until - If set this will indicated the last date for which the appointment will recur.
- Notes - This will allow the free text entry of any notes relevant to the booking. This is not the same as treatment notes.
Recurring Appointments
Recurring appointments can only be defined at CREATION. Once saved each instance of a recurring appointment can be managed, deleted, and changed independently of the parent.
Patient Details

Two options exist when adding Patient Details to the appointment. You can search for an existing patient, or you can add a new patient.
Searching for a Patient
To search for a patient simply start typing the patient's name in the search box.
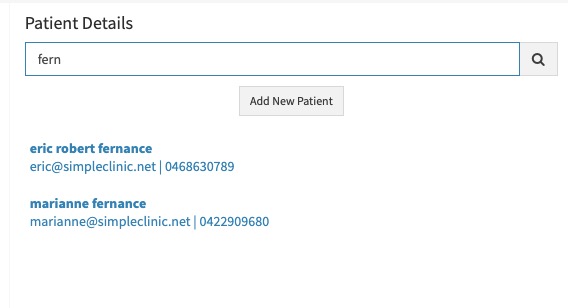
All patients that have been created already with their contact details will be displayed in the list below. To select a patient click their name. This will add the selected patient to the appointment.
If you can't find the patient when searching, or you know the patient does not already exist click Add Patient.
If you have entered a name in the search box we will use that as the starting point to create the new patient record.
The following information is required when creating a new patient from the diary. All other fields are optional.
- First Name
- Last Name
- Phone
Once you have finished entering any information you would like about the patient click Create Patient from the bottom of the form to save the patient record. This will add the new patient to the appointment.
Recurring appointments
Recurring events can be created at time of booking. This might include creating a regular weekly appointment as part of a detox or weight loss program.
This is controlled by setting the Recur Until date and the Recur Frequency date under the Recurring Settings options when creating an appointment. Recurring events can only be created at time of booking and cannot be created after an appointment is created.
Each instance of a recurring booking will be created as its own event in the diary linked back to the parent event.
The following rules are checked when saving recurring appointments.
| Recur Frequency | Validation |
|---|---|
| Daily | Daily appointments cannot recur for more than 3 months |
| Weekly | Weekly appointments cannot recur for more than 9 months |
| Monthly | Monthly appointments cannot recur for more than 24 months |
Adding Service Options
If you create Service Options for a Service these are available to add to appointments when booking through the practitioner diary.
When a service is selected with associated Service Options the Options button at the right of the service select box will be enabled.

Checking the box next to the service option will add the duration to the service.
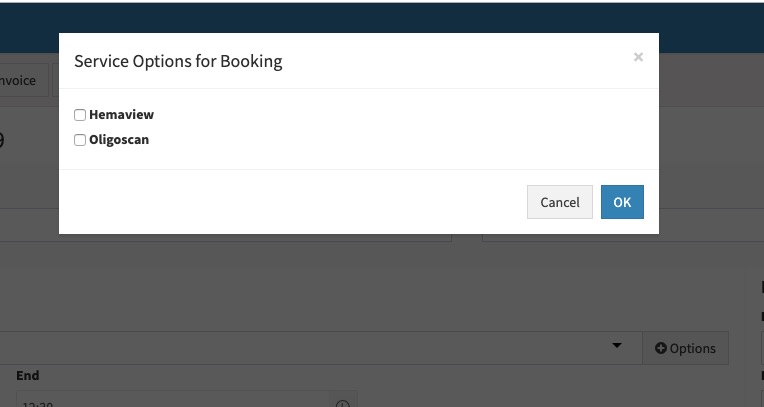
Service options can be added after the event has been created.
Service Options & Online Booking
Service options are NOT currently available through the online booking.
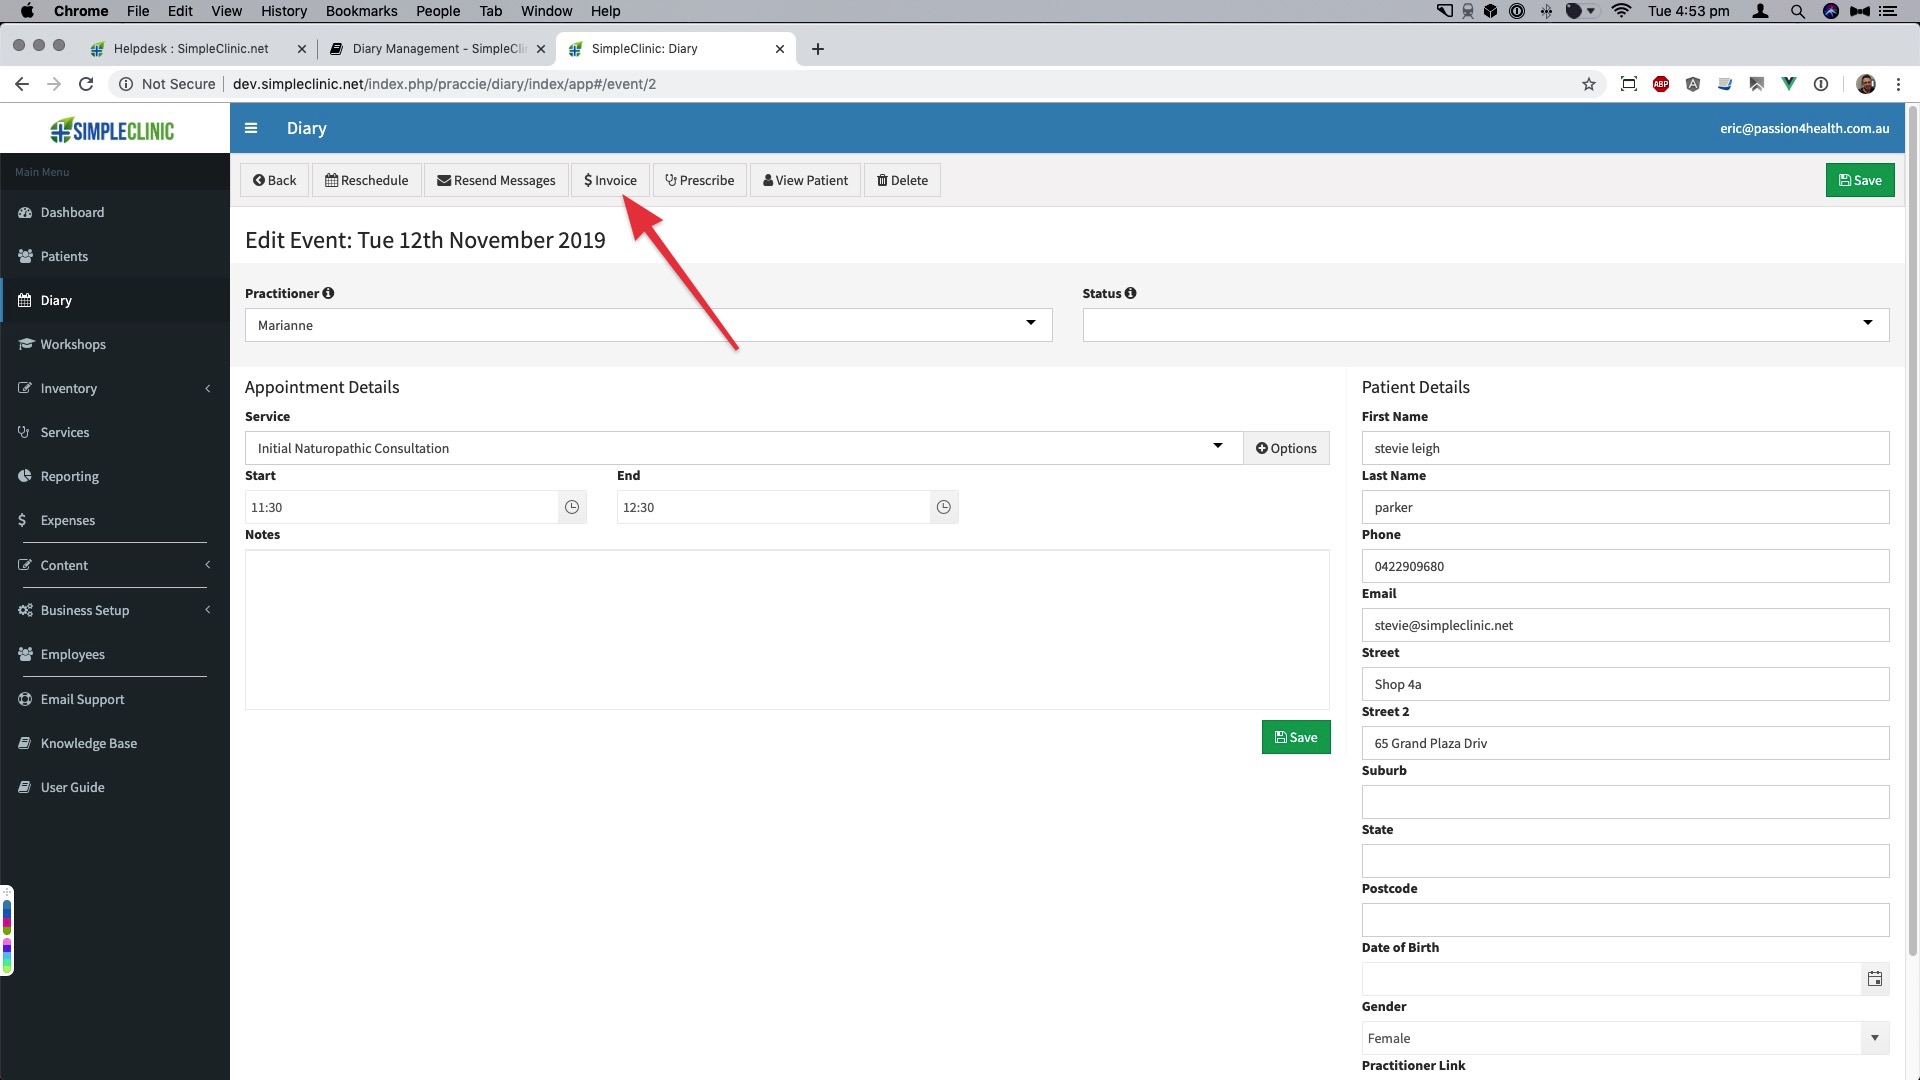
Invoicing An Appointment
There are two main ways to convert a diary appointment to an invoice.
Firstly, from the action bar you can invoice an appointment by clicking the Invoice button.
Secondly, you can invoice an appointment by clicking the Invoice link in the hover over that appears when hovering over the appointment.
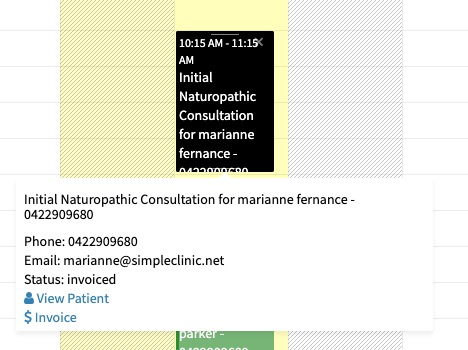
Regardless of the method you use you will be redirected to a new invoice for the patient. The service will be added to the invoice based on the linked invoice item. See Creating New Services for more information about linked invoice items.
Rescheduling An Appointment
In the Diary, you can drag and drop appointments to different times within a day, or to a new time on a different day within the same week, but moving an appointment to a different week is a slightly different process!
If you would like to visually reschedule an appointment to a different week, follow these steps:
-
In the Diary, click on the appointment you wish to reschedule
-
The appointment details window will appear
-
From the action bar click the Reschedule button.

-
Click on the Move option, and a confirmation info message will appear. Click on OK to proceed
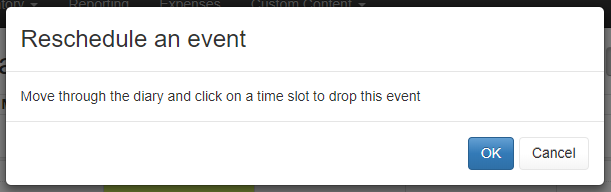
-
Move through the Diary to a new week
-
Click on a free day/time slot, and the appointment details window will appear again. Edit any details if needed, or click on OK to save
-
The appointment will be moved to the selected time slot!
Creating a Block In the Diary
Blocks are an appointment that is not linked to a patient. An example of blocks are personal appointments or lunch breaks.
To create a block right click on the time slot you would like to block.
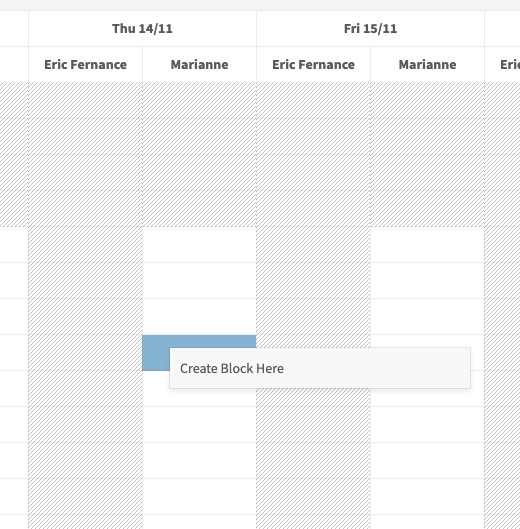
From the popup menu choose Create Block Here.
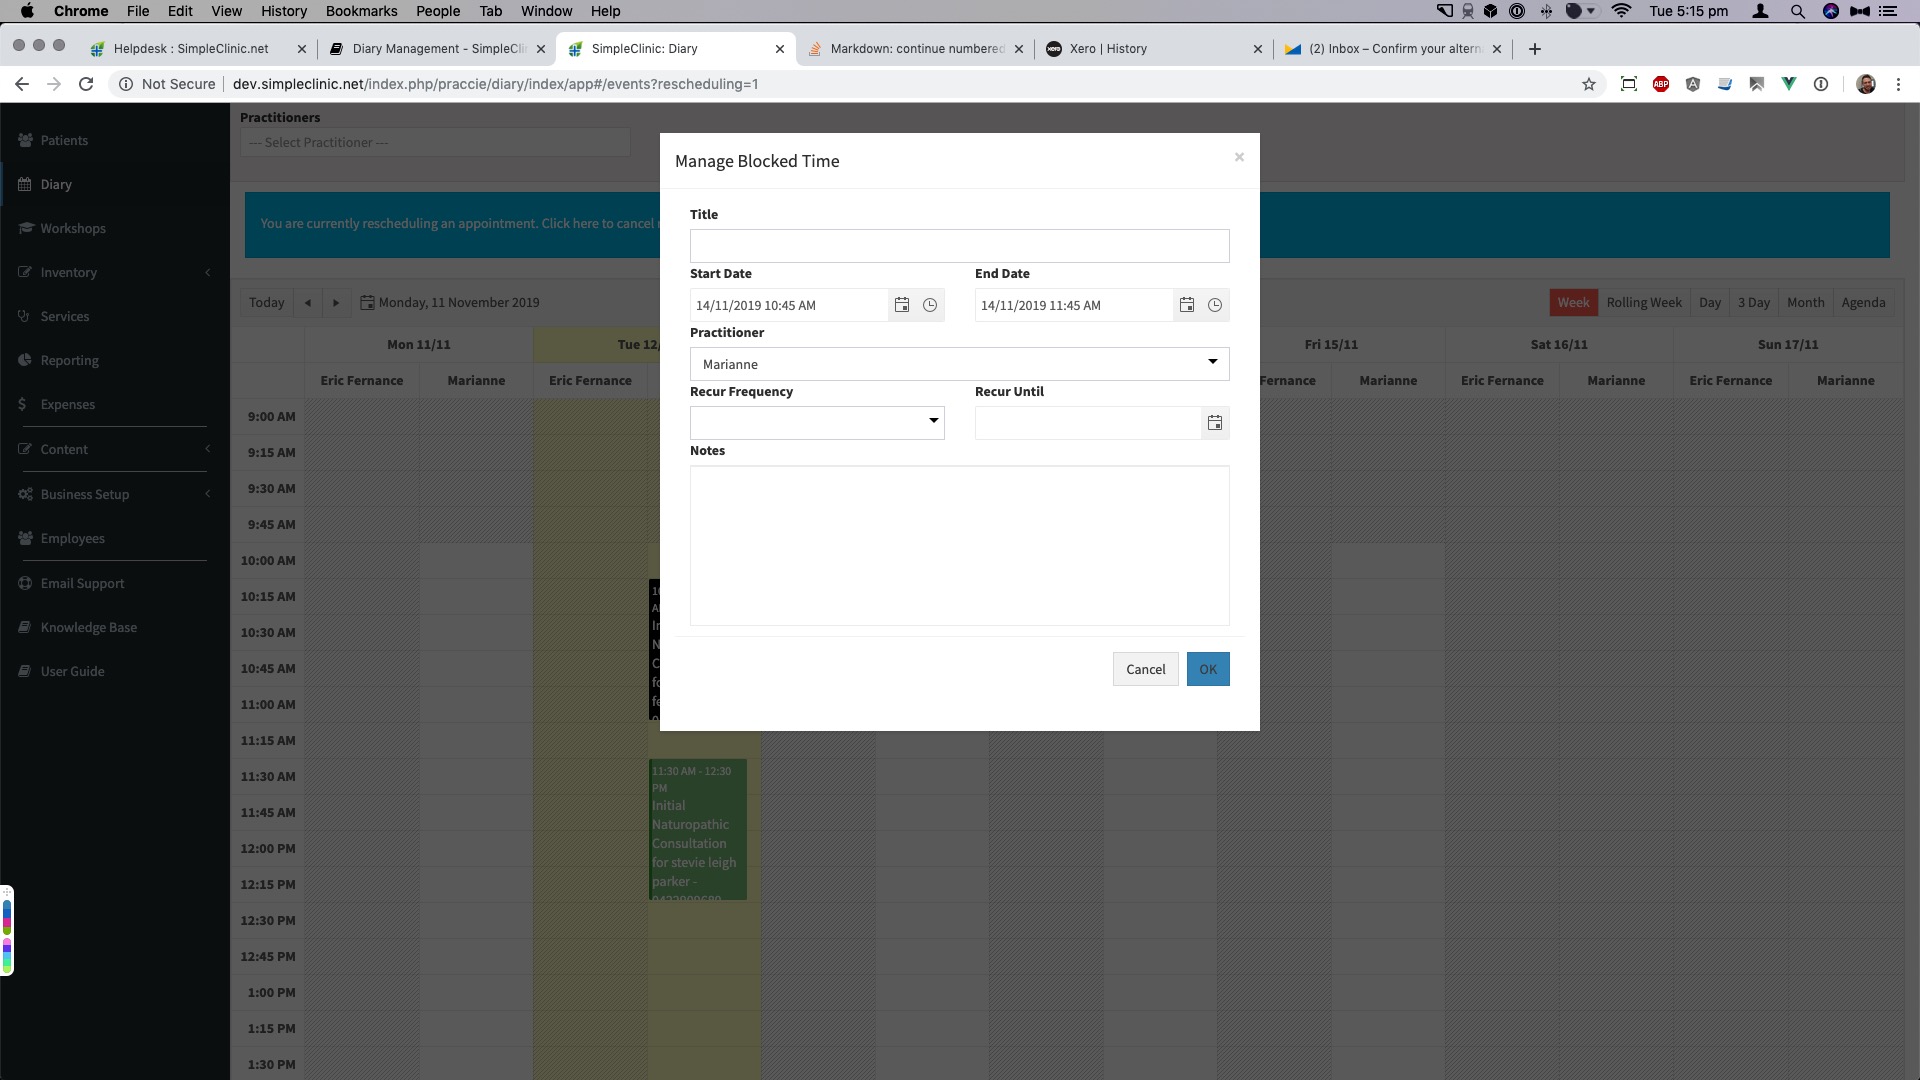
When creating a block the following information is required.
- Title
- Start Date
- End Date
- Practitioner
If you have used the right click method the start date, end date, and practitioner will be automatically populated from the time slot selected. If you clicked Add Block from the action bar, you will need to provide this information.
You can also elect to make the block a recurring block. This can be a convenient way to block out lunch breaks.
The following rules are checked when saving recurring appointments.
| Recur Frequency | Validation |
|---|---|
| Daily | Daily appointments cannot recur for more than 3 months |
| Weekly | Weekly appointments cannot recur for more than 9 months |