This Diary View is Discontinued
These instructions relate to the legacy diary view. This diary view was deprecated on the 11th November 2019. If you wish to enable this diary view you can do so from Business Setup -> Diary Settings.
Please be aware no support or ongoing development is provided for deprecated functionationaly.
Diary Management
Selecting the Diary menu item from the SimpleClinic menu allows you to create / edit / move / delete appointments in the diary.
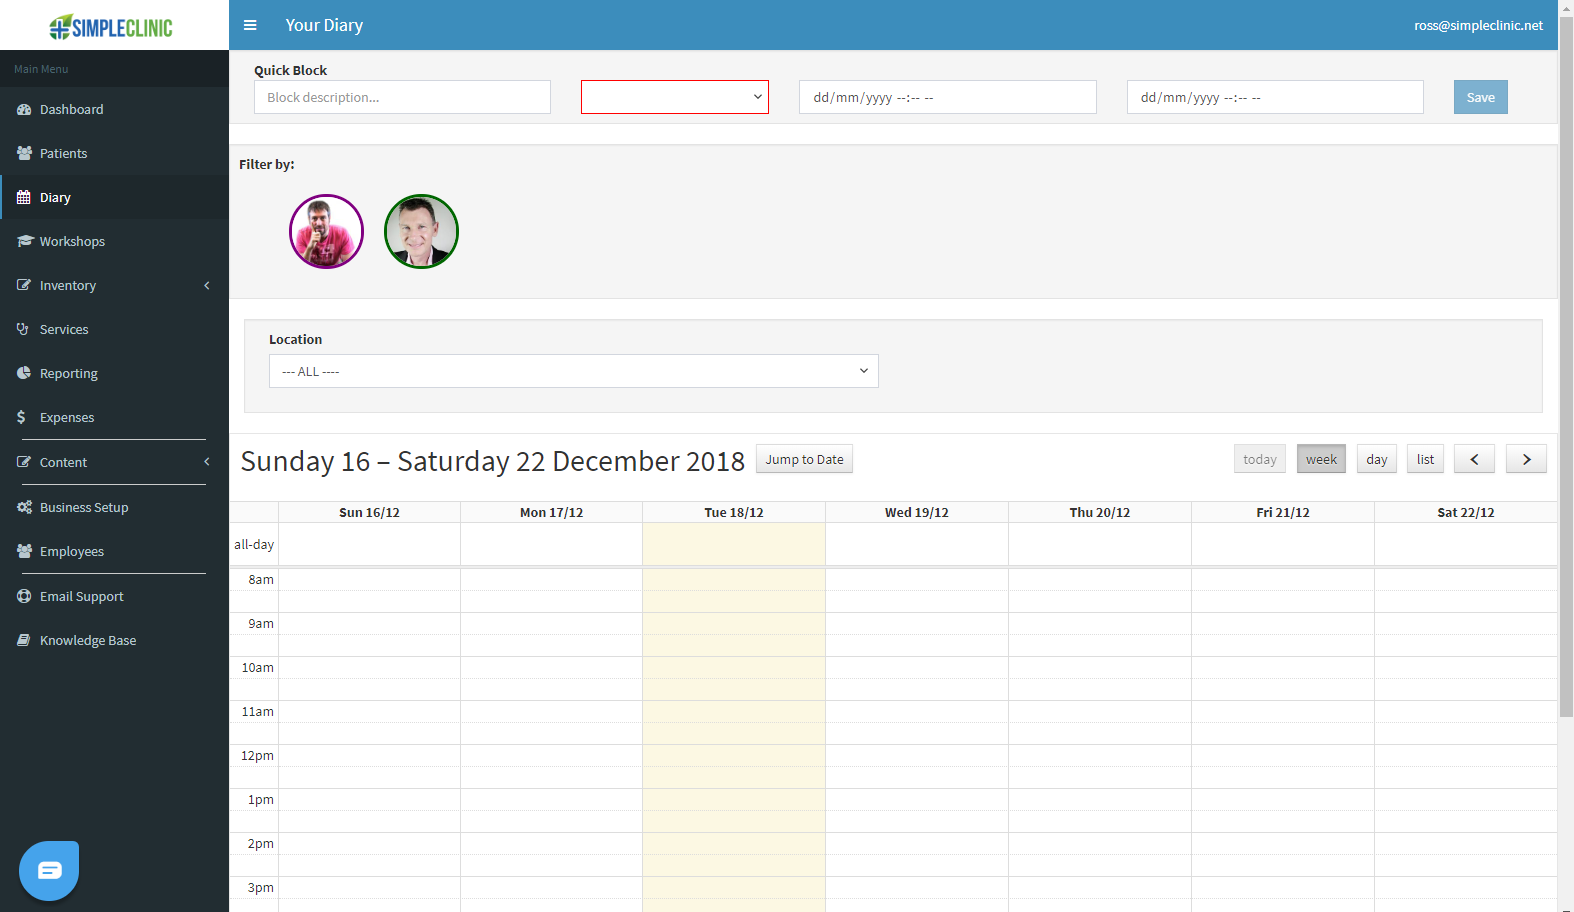
By default, ALL practitioners linked to your account will be displayed. Each practitioner\'s profile will be bordered with a colour indicating the colour of their appointments in the diary. Clicking on a practitioner's profile picture will toggle on or off the display of their appointments in the diary.
The hours and time increment used to display the calendar are configured based on your Business Settings. The business administrator can change this or raise a support ticket.
Create An Appointment
To create an appointment just click the time slot in the diary for which you would like to create an appointment.
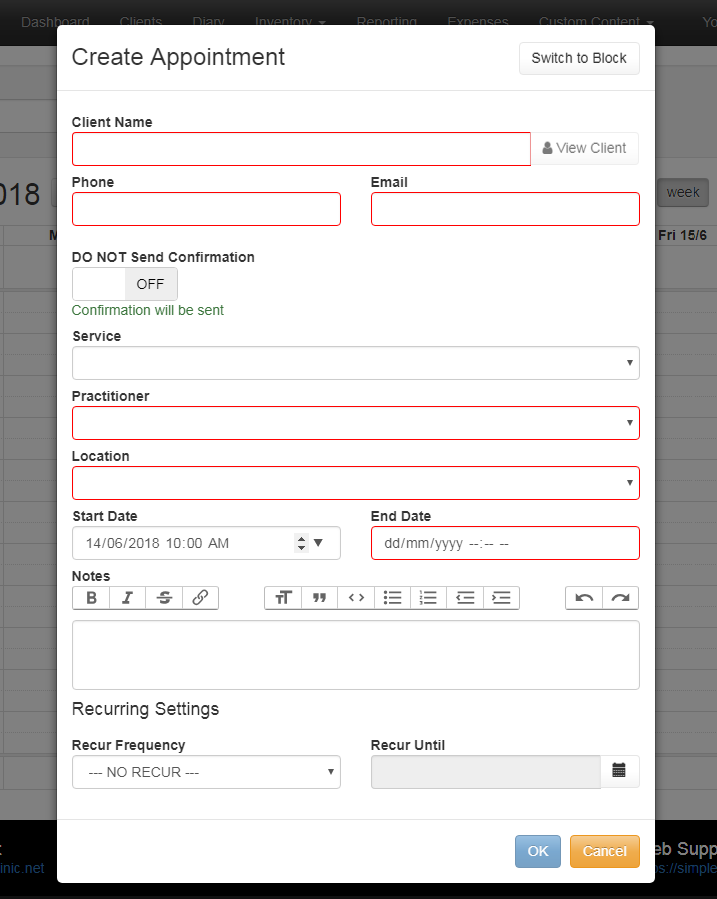
This will show a modal box that can be completed with all the relevant details to create the appointment in the diary. The red boxes indicate fields which are mandatory to complete in order to save the appointment.
The following information is required when creating an appointment.
- Client Name -- The client name field will autocomplete after the first three letters of their name are entered. If the client already exists they can be selected from the popup list. Selecting a client will auto populate the details into the phone and email fields. If the client doesn't exist you will need to enter their phone and email manually.
Creating an appointment for a non-existing client will automatically create a new client record.
-
Phone -- The phone will be auto populated if a client record is selected, otherwise it needs to be entered manually. If you auto select a client record and then change the phone number at this point the new number will be saved for the client.
-
Email - The email will be auto populated if a client record is selected, otherwise it needs to be entered manually. If you auto select a client record and then change the email at this point the new email will be saved for the client.
-
Send Confirmation - Use the toggle to select whether the client will receive and email and/or SMS text message confirmation of the appointment.
-
Service -- A service from your defined services needs to be selected from the drop-down box. Based on the service the linked practitioner will be auto selected in the practitioner drop down box and the start date and end date will be automatically populated based on the service duration.
-
Practitioner -- The practitioner is auto selected based on the service you select. This can also be changed if you wish to link to another practitioner.
-
Start Date -- The start date is auto populated based on the time slot that is clicked.
-
End Date -- The end date is auto populated based on the time slot that is clicked plus the service duration. The end time can be adjusted if needed.
NB - If you wish to disable email integrations for one or more practitioners, you will also be prompted to select the practitioner for the new client.
Recurring appointments
Recurring events can be created at time of booking. This might include creating a regular weekly appointment as part of a detox or weight loss program.
This is controlled by setting the Recur Until date and the Recur Frequency date under the Recurring Settings options when creating an appointment. Recurring events can only be created at time of booking and cannot be created after an appointment is created.
Each instance of a recurring booking will be created as its own event in the diary linked back to the parent event.
Adding Service Options
If you create Service Options (in the Inventory -> Services menu selection), it is possible to show these when creating an appointment. Service options can increase the duration of the service being performed. More information about Service options are available in the Service section.
When selecting a service with service options defined they will appear under the service in their own Additional Options section as a series of checkboxes.
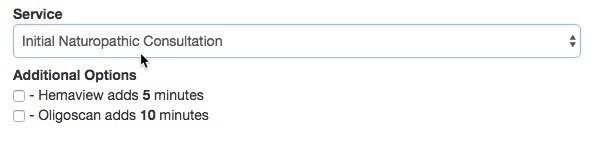
Checking the box next to the service option will add the duration to the service.
Service options can be added after the event has been created.
Invoicing An Appointment
Diary events contain an Invoice button at the bottom left of the event modal. Clicking this button will create an invoice for the client with invoice items predefined to the services linked invoice item. This is one of several ways to create a client invoice.
An invoice can also be created from the Client details screen, or via the Convert to Invoice button from the Prescriptions screen.
Rescheduling An Appointment
In the Diary, you can drag and drop appointments to different times within a day, or to a new time on a different day within the same week, but moving an appointment to a different week is a slightly different process!
Of course you can still edit an appointment and manually edit the date and time, but it may be easier to do this via the visual Diary screen!
If you would like to visually reschedule an appointment to a different week, follow these steps:
-
In the Diary, click on the appointment you wish to reschedule
-
The appointment details window will appear
-
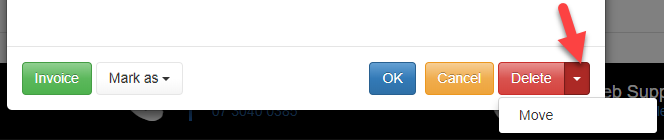
Notice the dropdown arrow option to the right of the red Delete button
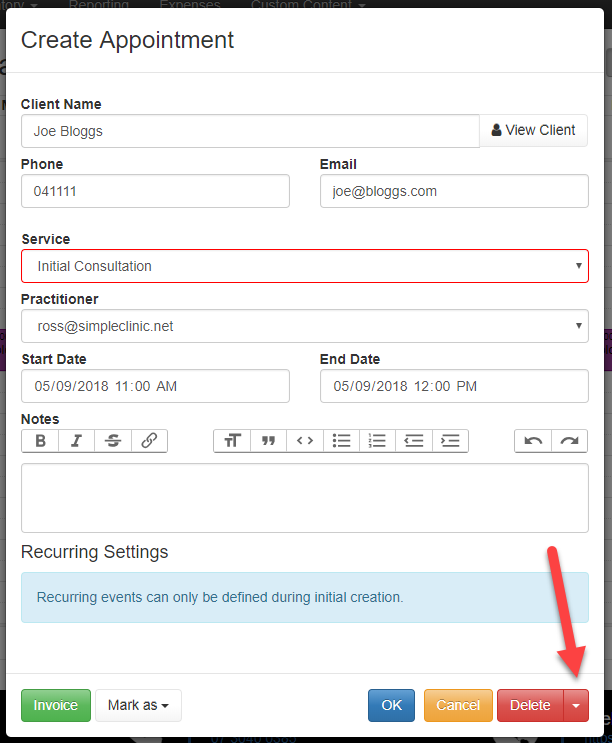
- Click on the dropdown arrow part of the Delete button, and a Move option will appear
-
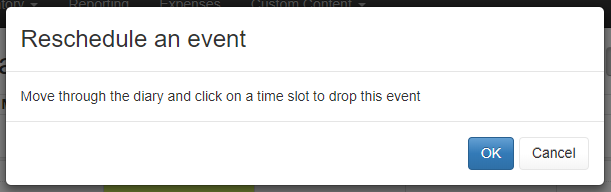
Click on the Move option, and a confirmation info message will appear. Click on OK to proceed
-
Move through the Diary to a new week
-
Click on a free day/time slot, and the appointment details window will appear again. Edit any details if needed, or click on OK to save
-
The appointment will be moved to the selected time slot!
NB - At this stage, the client will not receive a new confirmation email or SMS message for the new time. They will, however, receive a reminder email and/or SMS message before the new time.
Creating a Block In the Diary
If you are using the WordPress or iframe plugin on your website or social media pages, then your SimpleClinic calendar is used to calculate your availability for online bookings. Any timeslot that is available and within your nominated trading hours will be shown for people to book in.
To block out times and mark them non-available you can create appointments in the calendar that aren't linked to a client. There are two ways to do this.
Create a block using the Quick Block Settings
Quick block box at the top of the page will allow you to enter a note, select a practitioner and enter block start and end dates. The quick block will be created immediately in the diary.

Create a block using the Diary
The other way to block out a time is to click the time slot in the diary that you wish the block to start. This will display the Create Appointment modal window.
At the top of this modal is the Switch to Block button. Clicking this button will allow you to create a block as shown on the following screen.

The red box indicates that the practitioner name must be selected in this modal, in order to save the block.
Blocks can also be created for repeating events, using the Recur Frequency and Recur Until fields. This is ideal for blocking out certain times or days during the week that a practitioner is not available for a short time such as for meetings, lunches, holidays or other reasons.
Block with multiple locations
If a clinic or practitioner covers multiple locations, and there is more than one location specified in the Business Setup->Additional Locations setting, then the \"Create a Block\" window will also prompt you for the location to apply the block to.
This can allow one location to have a blocked-out period, but the other location can still be available for client bookings, or a block can be applied to ALL locations in one step!