Workshops and Events
SimpleClinic can also be used to manage clients for workshops and events, take bookings and online payments too! Use this feature for your presentations, talks, courses, webinars or classes!
Workshops and events cannot be booked directly from the Diary screen. Instead, select the Workshops option from the main navigation bar at the top of the screen.
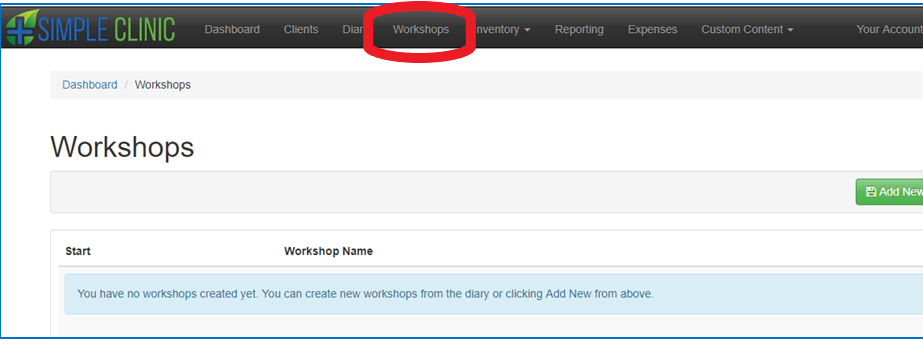
The initial screen will show a list of all events, in descending date order. When there are events to display, they can be viewed to open them and check or edit the event details, or the event can be deleted.
Create a workshop or event
Click on the Add New button to create a new event.
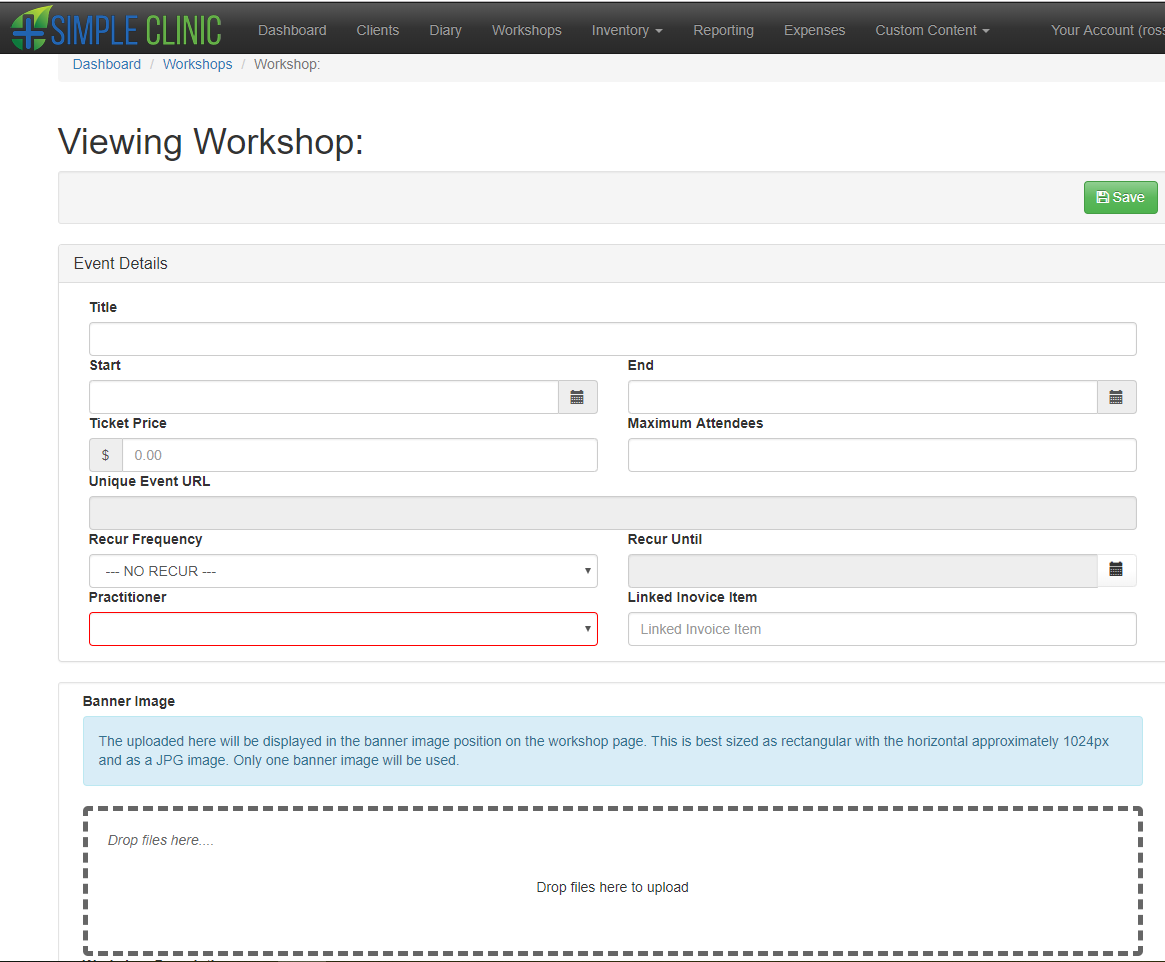
The details which can be selected or entered on this screen include the following:
-
Event title -- type in a descriptive name
-
Start and End dates and times -- use the date picker buttons
-
Ticket price -- enter the cost, or 0.00 if free!
-
Unique Event URL -- when the event is saved, this field will be automatically filled with a website address, which can then be used on your website, Facebook page, or a third party booking service, for clients or the public to book into the event
-
Recurrence -- whether the event repeats, how frequently, and the ending date
-
Practitioner -- an event must be linked to a practitioner, and the events and times will be blocked out in their Diary
-
Linked Invoice Item -- a paid event can be linked to an invoice item which will appear on the invoice for the booked in clients
-
Banner image -- a picture for the event which can be used in
-
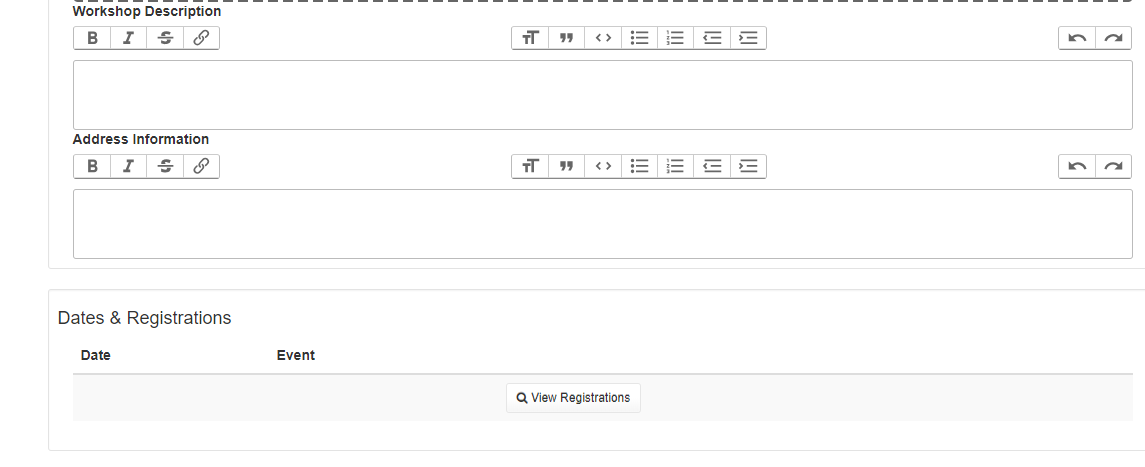
Workshop description -- the event details. This can be as long and detailed as you like! Use the formatting buttons as needed.
-
Address -- location details of the event.
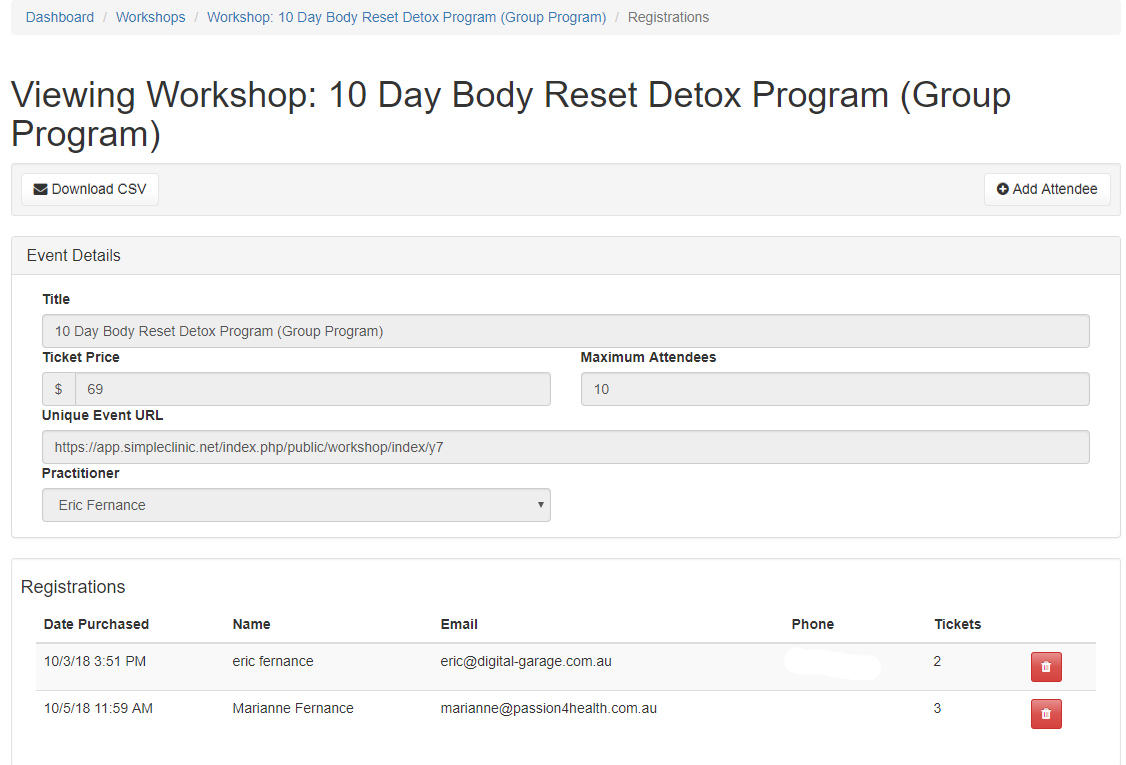
At the bottom of the event screen the registered participants can be viewed, and event exported to a CSV file if required.
People who book in for any event will be added to the clients list, if they haven\'t been added before. And if you have email integration enabled in the Business Setup, their details will also be added to the email list for future marketing!
Adding workshop attendees
Once an event has been created, you can access the list of people registered by clicking on the event in the workshop list, and clicking on the View Registrations button at the bottom right of the screen.
New attendees can be added to the registrations list from:
-
Clients or the public registering to your event from your website, Facebook page, or other advertising, and clicking on the unique event URL and booking and paying online
-
Clients paying for the event within your clinic or over the phone, and you or your staff can add them using these steps.
At the top right of the workshop registrations screen is the Add Attendee button.
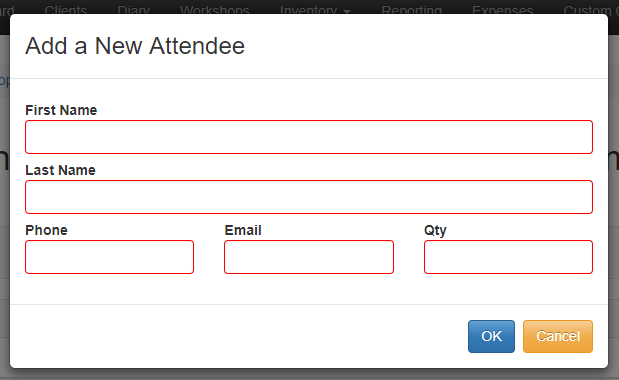
Enter the attendee\'s details into all of the fields (the red fields indicate that data is required), including the quantity of tickets they require. Click on OK to save. If the attendee is a new client, their details will be saved, or if they are an existing client, their existing client record will be linked to the event.
Deleting workshop attendees
Workshop attendees may decide they cannot attend the event or workshop. If you have limited numbers of people for an event, you will want to remove those who cannot attend from the list. At the bottom of the registrations page is a list of people who have booked in for the event.
To delete someone who cannot attend, click on the red button (marked with a rubbish bin icon) on the right.
Adding an event to your website or social media
When you have created and saved a workshop, a Unique Event URL will be added to the event details. This URL can be shared on social media or your website to allow users to book for your workshop on a SimpleClinic hosted page and pay for the event online.
If you wish to embed this URL on your own website you can use the following code snippet:
\<iframe src=\"youruniqueeventurl?view=iframe\" width=\"100%\">\</iframe>
Replace the youruniqueenenturl word/text with your event ID from the event\'s Unique Event URL by marking, copying and pasting this into this code snippet on your website.
You will notice the addition of ?view=iframe at the end of your unique Event URL. This addition will remove all the branding elements, the banner image, description and social share icons. The only page element that will remain when using this is the booking form. This allows your page to provide all the visual and text description for your event.